Mounting agricultural tyres
You can comply with fitting-related safety procedures by using appropriate equipment, implementing suitable methods and deploying a compressed air system featuring a safety device. And, of course, you should also use safety goggles, safety footwear, hearing protection and a tyre cage. Keep your distance if a tyre cage is not available (when inflating the tyre).
Remove old agricultural tyre
You must first remove the old tyre before you can start fitting the new one. Never do this if it is still inflated! Use wedges to make sure the tractor or agricultural vehicle cannot move. Then install the jack so the wheel in question is lifted off the ground.
Apply fitting grease to the edge of the wheel rim and the heel of the tyre. This will make it easier to remove from the wheel rim, so long as appropriate equipment is used.
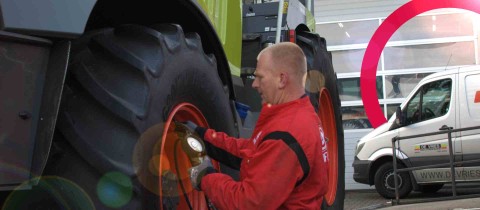
Prepare to fit the agricultural tyre
Before fitting a new tyre - which should be done vertically (on the vehicle) because this offers better checking possibilities - certain preparations are needed:
- Check if the tyre, rim and inner tube are compatible with each other and with the vehicle and purpose.
- Clean the rim and check for damage (on the inside).
- If the tyre has an inner tube, always use a new one. Naturally, you should use a tubeless rim if the tyre is tubeless; plus, always fit a new tubeless valve.
- If thick tyres are involved, always use hydraulic equipment like a bead breaker and/or mini lem.
Finally, apply tyre grease to the edge of the wheel rim and the heel of the new tyre. Make sure there is a thin layer on the inside and outside of the tyre (tip: on the outside, ca. 5 centimetres higher than the edge of the rim).
7 steps when fitting an agricultural tyre
Before you start, make sure the valve or valve opening is located at the bottom. Then:
- Use the first heel to pull the tyre over the edge of the rim.
- Then push the rest over the edge, bit by bit. The heel of the tyre should be in the deepest groove of the rim.
- Slightly inflate the inner tube, place it inside the wheel rim and insert the valve through the valve opening.
- Push the second heel over the edge of the rim and into the deepest groove of the rim (end next to the valve).
- Centre the tyre on the wheel rim.
- Make sure the inner tube has not been trapped by the heels.
- Inflate the tyre to approximately 2.5 bar, which will push the heels into the correct position.
A few general tips:
You must take several essential factors into account when mounting (new) wheels. For instance, you must have a procedure for tightening bolts, which is based on a pre-determined sequence and particular values. We’ll give you a few tips!
- Never heat wheel rims on which tyres have been fitted (no welding or soldering).
- Regularly check the tyre pressure.
- Low tyre pressure causes unnecessary wear and tear to the casing.
- High tyre pressure reduces the tyre's contact area with the ground (loss of grip, susceptible to damage).
Switching diagonal between bolts
Wheel bolts must be tightened step by step, switching diagonally between bolts each time; until the required value has been achieved. Damaged or rusty bolts should be replaced with new ones. Torque values can be found under the technical data in the vehicle handbook.
Double check wheel bolts
Wheels are always treated with a base coat and top layer before delivery. Although this protects them, bolts can also wear down this protective layer over time; particularly if wheels are changed on a regular basis. So an extra check can’t do any harm.
Wheel bolts also need to 'settle' once they have been tightened. That is why wheel bolts must be checked after the first 50 to 100km on new vehicles or when tyres are changed. They will only be safe and correctly mounted after this check.
If the vehicle is being used in extreme conditions, we also recommend checking wheel bolts during routine checks.
The last step before inflating the tyre
Before trying to inflate the tyre, check if the heels are in the correct position. Once this has been done, the tyre can be inflated until the appropriate pressure is reached. Do this using a tyre cage; alternatively, maintain enough distance.
Finally
Before trying to inflate the tyre, check if the heels are in the correct position. Once this has been done, the tyre can be inflated until the appropriate pressure is reached. Do this using a tyre cage; alternatively, maintain enough distance.
Terms relating to the mounting of agricultural tyres
We possess a wealth of knowledge about wheels and tyres. And we are pleased to share it with you. For example, when it comes to wheel disks and mounting possibilities. Because this is quite a complex matter, we have decided to help by explaining a few everyday terms.
Wheel disk
The wheel disk forms the connection between the rim and the wheel hub. The disk is used to connect the wheel and rim to the vehicle. This can be done on the hub plate (flange) or the brake drum.
The shape of the disk is determined by several factors. For instance, the shape of the rim, the axle connection and the shape and type of brake. However, load-related requirements and aesthetic appeal are also considered.
Wheel mounting
Wheels can be mounted in various ways (depending on the vehicle). You must take a few things into account, mainly the size. Wheel manufacturers mention this information along with the vehicle specifications. What you must look out for:
- Diameter centre hole
- Diameter bolt circle
- Number of bolt holes
- Diameter of bolt holes
- Type of bolt holes
- Position of the wheel disk (ET value)
Offset or ET value
The offset (or ET value) is the distance between the centre of the rim and the mounting pad and hub. The offset (or ET value) can be either positive or negative. The track width of the vehicle is determined by the flange size/axle length and the offset of the rim.
The offset will be positive if the back of the mounting pad is located past the rim's centre line and closer to the face of the rim. The offset will be negative if the back of the mounting pad is behind the centre line of the rim.
Like to know more?
Do you need advice? Please contact us, our experts will be pleased to assist you. Contact our experts at +31 (0)523 - 850 850 or by e-mail to info@heuver.com. You can also read all about agriculture on the agricultural knowledge-page.